Build the Reception Around a Consistent Warm-Light Baseline
Reception lighting design gives the camera three connected layers: ambient light establishes the room, accent light describes its architecture and flowers, and table-level illumination brings warmth close to faces. Their relationship determines whether an evening photograph holds both the intimacy of a toast and the depth of the room surrounding it.
Set the electric lighting to a coordinated 2200K–2700K range, specify LED fixtures rated CRI 90 or higher, and give dining-table illumination its own attention. Keep uncalibrated colored effects away from faces during the moments that matter most.
Begin the venue walk-through with the existing chandeliers, sconces, and house circuits. A handheld spectrometer lets the lighting team assess their color before choosing rental fixtures. Agree on a warm baseline, then gel or switch off sources that conflict with it. The Department of Energy explains the terminology behind color temperature and correlated Kelvin ratings.
The eye adapts readily as guests move between candlelit tables and brighter architectural lighting. A photograph records those sources together under a chosen white balance. Cool illumination across one cheek and warm illumination across the other creates a divided color treatment; uneven LED output can introduce green or magenta casts as well. Kelvin describes warmth, while color rendering describes how faithfully the source reveals colors. Specify both.
Natural candle flames sit warmer, around 1800K–2000K. Let that amber character remain visible within a coordinated electric-light scheme rather than trying to neutralize every flame.
Give Candlelight Enough Density to Reach Seated Faces
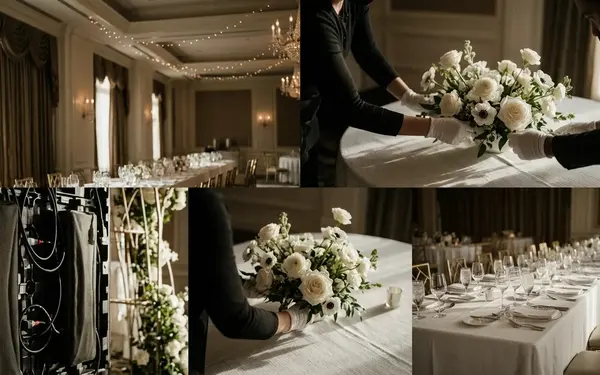
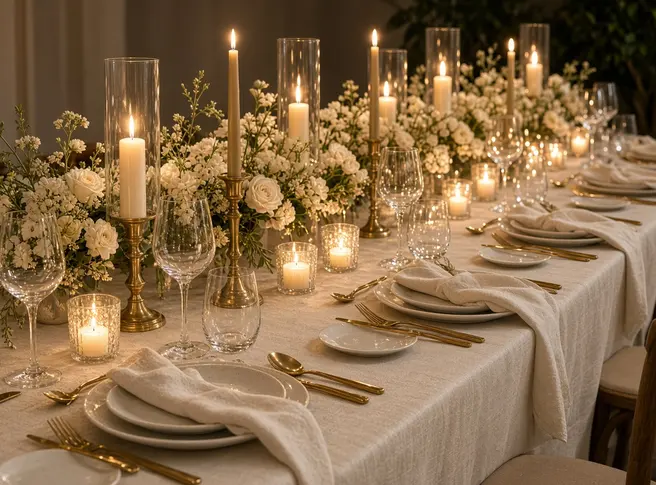
Picture an eight-foot banquet table dressed in bone-colored linen. Brass tapers rise between flowers; glass-enclosed pillars establish a lower rhythm. The useful question is whether that arrangement carries light above the plates and toward the people sharing dinner.
Count Flames Along the Whole Table
Use 12–16 flames as the planning range for an eight-foot banquet table, then check the arrangement from seated eye level. A specific composition of eight beeswax tapers and six to eight hurricane-enclosed pillars totals 14–16 flames. Distribute them along the table instead of concentrating the entire glow around its center.
For 60-inch or 72-inch rounds, arrange nine to eleven flames at varied heights around the centerpiece base. Look for warm catchlights and readable expressions at the outer seats. A beautiful centerpiece can dominate the photograph while leaving the people around it in shadow.
Taper holders in the eight-inch to fourteen-inch range establish variation. Submit the complete candle assembly for venue approval before ordering; specify noncombustible glass hurricanes with flames recessed at least two inches below the rim, subject to the property's fire-safety requirements.
Let Brass Sparkle and Linen Soften
Unlacquered brass contributes small, warm specular highlights. Heavy matte flax, oat, or bone linen returns a softer glow upward. Crystal and silver provide brighter points within that quieter field, giving wedding details & design texture without making every surface equally reflective.
Dark velvet, charcoal, and navy coverings absorb that upward glow, so add a separately dimmable warm fill layer when choosing them. Test the complete place setting with someone seated: does the light reach their eyes, or stop at the charger?
Aim Floral Pin-Spots Across Tables and Dim the Bistro Canopy
Overhead accents need precise boundaries. Narrow-beam pin-spots should describe floral arrangements while leaving chair backs, foreheads, and surrounding floor comparatively quiet. Position fixtures on approved ceiling architecture or tent rigging, then focus them with the final centerpiece height represented.
Cross-light each arrangement from opposing positions. Use a 35-degree to 45-degree aiming angle and a five-degree to ten-degree beam spread as setup targets, with warm fixtures coordinated to the room. The opposing beams give flowers dimensionality without concentrating all illumination directly overhead.
Protect Toast Faces
A vertical beam striking a speaker's brow creates deep eye-socket shadows. During focusing, place someone at the table edge in the anticipated toast position and adjust the beam onto the flowers.
Bistro strands perform a different task. Across an open courtyard or clear-top tent, their visible filaments establish an intimate ceiling and repeating background highlights. Specify inline commercial dimmers for S14 or ST19 filament strands so the crew can reduce their output as twilight fades.
A 20%–35% setting provides a starting point after dark. Check it through the photographer's working exposure: the bulbs should retain a sense of filament and warmth rather than becoming solid white circles behind the couple. Keep their circuit independent from the floral accents.
Light the Surfaces That Give Philadelphia Venues Their Character
A dark tuxedo needs a background with some tonal separation. Before placing perimeter fixtures, map the camera's likely view during toasts and the first dance. Illuminate the architecture within those sightlines so wide documentary frames retain the room's depth.
- Center City ballrooms: use 2700K amber-white light to articulate limestone columns and plaster molding. Place fixtures around architectural divisions so the illumination follows the room's proportions.
- Fishtown and Old City lofts: graze exposed masonry to reveal its texture. Fixture spacing of eight to twelve feet, positioned six to ten inches from the wall, offers a practical setup benchmark.
- Main Line estate tents: direct 2700K perimeter washes onto pleated fabric liners, creating a broad overhead bounce surface.
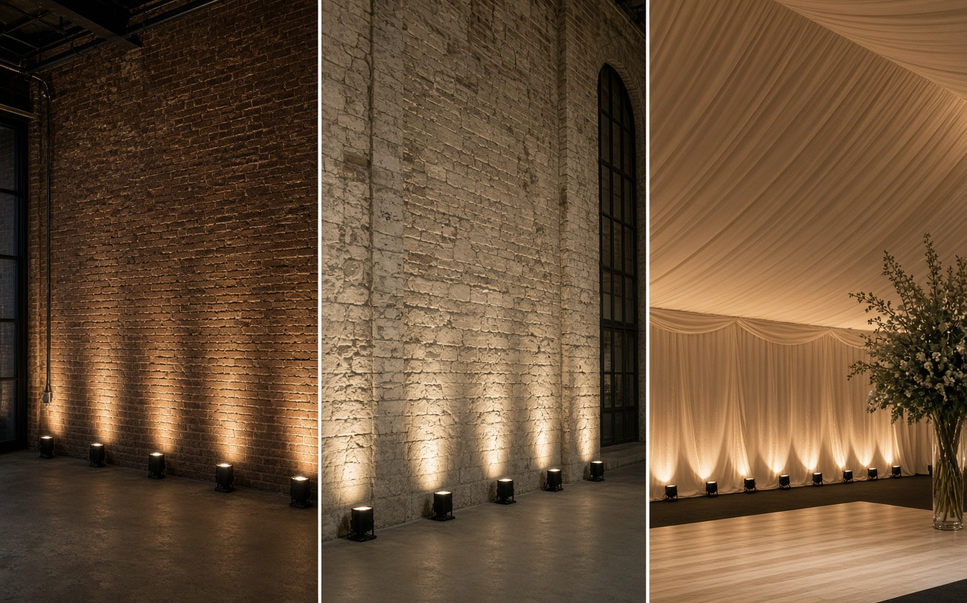
Across these Philadelphia venues, keep the electric layers within the same warm range and specify CRI 90 or higher. Saturated magenta, electric blue, and purple washes impose their color on skin and ivory fabric. Reserve those effects for a separately controlled party cue, away from the formal photographs.
Put Warm-Light Controls in the Contract Before Paying Deposits
Ask the lighting designer, DJ, and rental house to answer the same technical questions before booking. A coordinated specification turns a romantic mood description into equipment and controls the crew can execute.
- Which fixtures will arrive? Request model details, Kelvin settings, CRI ratings of at least 90, and available deep-red rendering information.
- Which layers dim independently? Require separate control zones for table accents, architectural perimeter lighting, bistro strands, and the dance-floor wash.
- Who operates each transition? Name the person responsible for house lights, rental fixtures, and DJ effects.
- Which effects stay off during formal moments? Include a rider excluding uncalibrated sound-active lasers, moving-head dots, and saturated green or magenta washes during the first dance, parent dances, and cake cutting.
Four to six weeks before the wedding, review those zones against the reception floor plan. Rehearse the dinner-to-dancing cue within the roughly three-minute window after the final formal toast and before the first dance: switch off harsh house sconces, halve the table pin-spot output, and hold the warm perimeter at 30%–40%. Check the resulting scene from the camera positions.
I would fund dense, venue-approved real candlelight and independently dimmable warm perimeter lighting before elaborate overhead rigging. Put the budget close to faces and behind the people you love: that combination gives their expressions warmth and their celebration depth.